Note | Arch Linux Installation
Notes how to install Arch Linux
紀錄一下怎麼安裝 Arch Linux,非常推薦讀官方的 Installation guide 這邊大概就是一個簡化版的安裝流程,不得不說 Arch 的自由度真的很高, 所以安裝的時候可以根據自己的需求來安裝。
Pre-installation
1.1 Connect to the internet
1.2 Update the system clock
1.3 Partition the disks
1.1 Connect to the internet
這邊會透過 systemd-networkd 來配置網路,如果要設置 Static IP:
nano /etc/systemd/network/20-wired.network[Match] Name=en* [Network] DHCP=no Address=10.1.10.9/24 Gateway=10.1.10.1 DNS=10.1.10.1 #DNS=8.8.8.8- 配置後
systemctl restart systemd-networkd重啟網路服務- 檢查
ip addr是否與配置一樣
- 檢查
1.2 Update the system clock
使用 timedatectl 來設置系統時間,首先 timedatectl set-ntp true 啟動 NTP 服務:
timedatectl list-timezones | grep Asia/Taipei查詢時區是否存在timedatectl set-timezone Asia/Taipei設置時區timedatectl status查看目前時間是否正確
root@archiso ~ # timedatectl status
               Local time: Sun 2024-03-03 15:21:00 CST
           Universal time: Sun 2024-03-03 07:21:00 UTC
                 RTC time: Sun 2024-03-03 07:21:00
                Time zone: Asia/Taipei (CST, +0800)
System clock synchronized: yes
              NTP service: active
          RTC in local TZ: no
設置成功應該會看到以上的訊息
1.3 Partition the disks
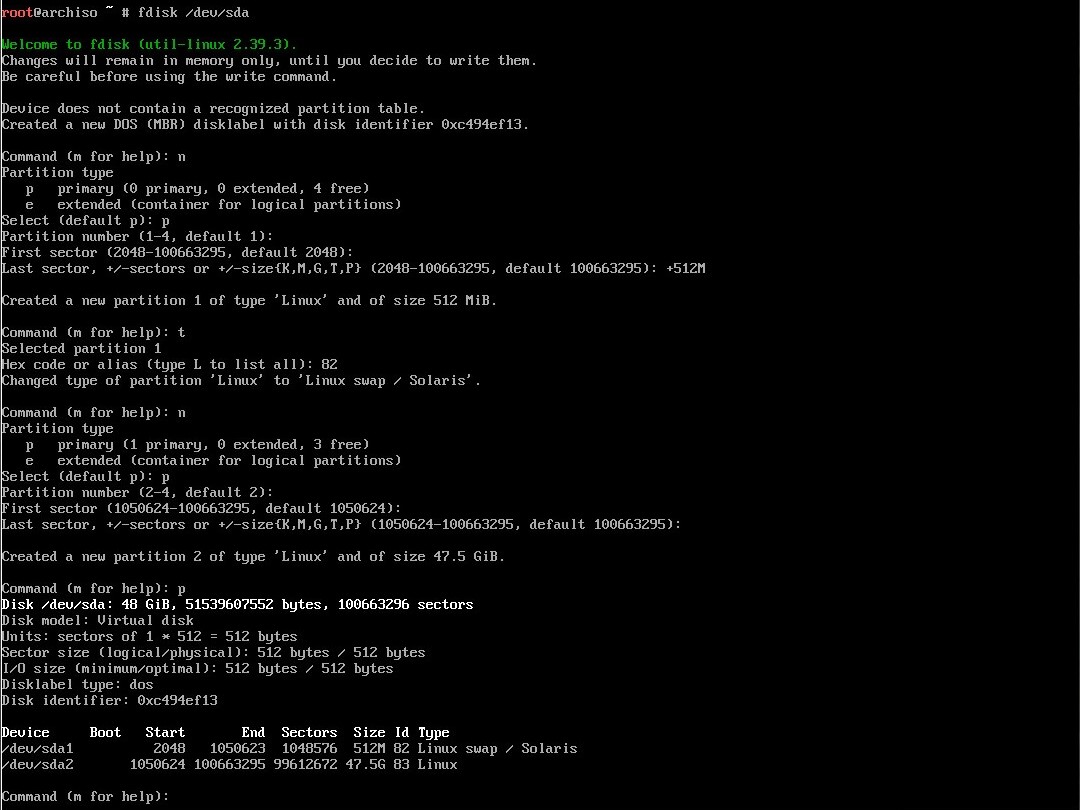
fdisk 是一個常用的分割硬碟的工具,這邊會使用 fdisk 來分割硬碟:
- 先使用
fdisk -l查看硬碟分割情況 fdisk /dev/sda開始分割硬碟- 這邊我只分割一個 SWAP 跟一個主分割區,因為剩下的空間會使用 Btrfs 來管理
- 使用 mkfs 來格式化分割區
mkswap /dev/sda1
swapon /dev/sda1
mkfs.btrfs /dev/sda2
mount /dev/sda2 /mnt
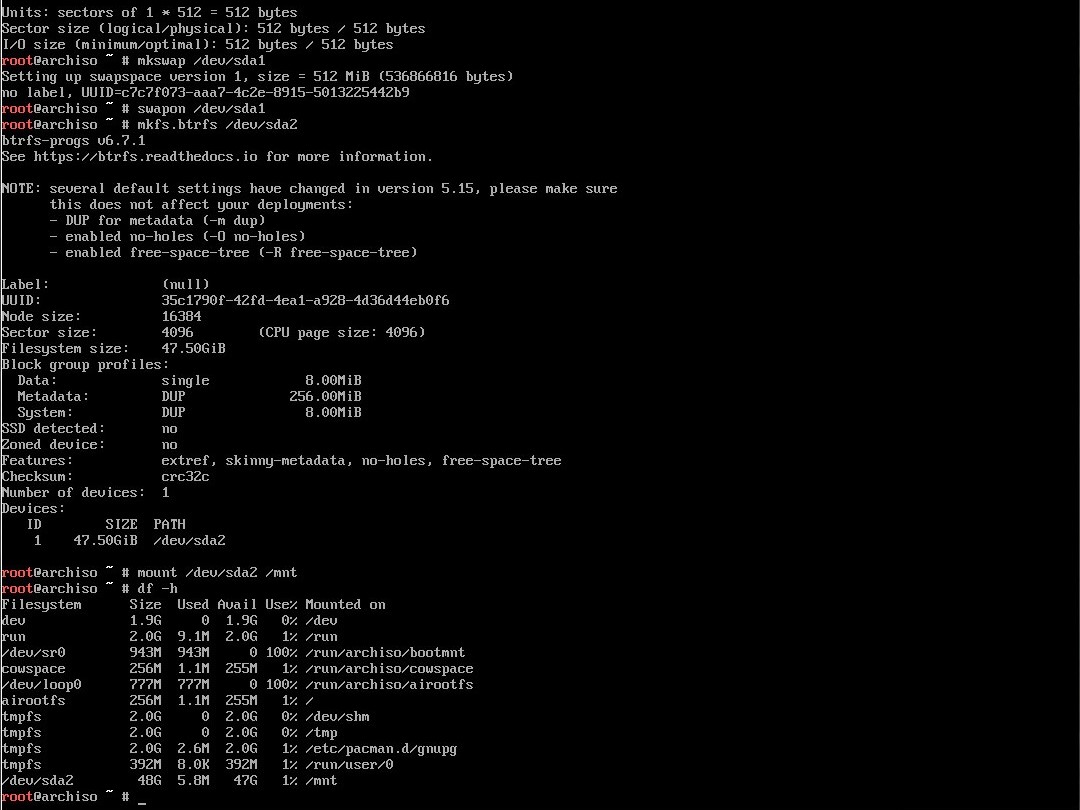
mount 之後操作就跟 Debian 一樣,唯一的差別是 arch 沒有 target 這個目錄,所以把操作的目錄都換成 /mnt 就好。
- 在最後的時候記得用
genfstab -U /mnt >> /mnt/etc/fstab來生成 fstab
延伸閱讀: 可以參考 Using btrfs on Debian 來設置 Btrfs,或者官方說明 Arch - btrfs
Install Linux
2.1 Select the mirrors
2.2 Install the base packages
2.1 Select the mirrors
這邊要選擇最快的鏡像,可以使用 reflector 來自動選擇最快的鏡像,或者手動編輯 /etc/pacman.d/mirrorlist 來選擇鏡像。
reflector --country Taiwan --age 12 --protocol https --sort rate --save /etc/pacman.d/mirrorlist- 選擇最近 12 小時內更新過位於台灣的鏡像,並且排序下載速度排序
- 官方也有一個提供的 Mirrorlist
這步驟也可以在安裝完系統後再執行,最好在進行前備份
/etc/pacman.d/mirrorlist
2.2 Install the base packages
使用 pacstrap 來安裝基本的套件,pacstrap /mnt base linux linux-firmware
- 如果想要安裝其他套件可以在後面加上套件名稱,例如:
pacstrap /mnt base linux linux-firmware vim openssh - 先使用
pacman -Sy更新套件庫,就可以使用pacman -Ss搜尋套件名稱
Configure the system
3.2 Chroot
3.5 Network configuration
3.8 Install a bootloader
剩下的部分官方文件都有詳細的說明,這邊就不再贅述,可以參考 Installation guide 來進行安裝。
- fstab 跟官方說明設置就好,然後記得查看是否有錯誤
3.2 Chroot
- chroot 可以讓你進入安裝好的系統,這樣就可以提前進行一些設置
- 如果在 pasctrap 少安裝了一些套件,可以在這邊安裝,例如:
pacman -S openssh - 安裝後記得到
systemctl enable sshd啟動 sshd 服務
- 如果在 pasctrap 少安裝了一些套件,可以在這邊安裝,例如:
- Time Zone
- 用 symbolic link 來設置時區,然後用
hwclock --systohc來設置硬體時鐘
- 用 symbolic link 來設置時區,然後用
- Localization
- Hostname
# Time Zone
ln -sf /usr/share/zoneinfo/Asia/Taipei /etc/localtime
hwclock --systohc

# Localization
vim /etc/locale.gen
# Uncomment `en_US.UTF-8 UTF-8` and other needed locales
locale-gen
echo "LANG=en_US.UTF-8" > /etc/locale.conf

# Hostname
echo ${YOU_HOSTNAME} > /etc/hostname
3.5 Network configuration
這邊可以參考 systemd-networkd 來設置網路,或者使用其他的套件來設置網路。
- 下面是沿用 systemd-networkd 的設置
vim /etc/systemd/network/20-wired.network
# Wired network like following:
# [Match]
# Name=en*

# [Network]
# DHCP=no
# Address=10.1.10.9/24
# Gateway=10.1.10.1
# DNS=10.1.10.1
systemctl enable systemd-networkd
3.8 Install a bootloader
這一步非常重要,因為如果沒有 bootloader 就無法開機
在安裝 bootloader 前先把 initramfs 跟 passwd 設置好,然後再安裝 bootloader。
- 選擇 GRUB 作為 bootloader,Arch 這邊有其他 bootloader 的選擇,可以參考官方文件
- 這裡沒有 UEFI 的安裝方式,如果要安裝 UEFI 可以參考官方文件 Arch - GRUB
# Initramfs
mkinitcpio -P
# Set root password
passwd
# Install bootloader, os-prober can detect other OS
pacman  -Sy grub efibootmgr os-prober
grub-install --target=i386-pc /dev/sda
grub-mkconfig -o /boot/grub/grub.cfg
這裡可以把剩下的部分都設置好,然後 exit 離開 chroot,官方是建議關機前 umount -R /mnt 卸載所有的分割區,然後再 reboot,
重啟之後如果進入 GRUB 引導到 Arch Linux 就代表安裝成功。
useradd -m -G wheel,users -s /bin/bash ${USER_NAME}新增使用者passwd ${USER_NAME}設置密碼
Other
4.1 Firewall
Arch 通常沒有預設安裝防火牆,並且 iptables 是被 systemd 服務管理的,所以最好開啟 systemctl enable iptables 來啟動防火牆服務。
並且要設置好防火牆規則,這裡有一個簡單的腳本 iptables-script.sh
- 設定完記得保存規則
iptables-save > /etc/iptables/iptables.rules
ip6tables-save > /etc/iptables/ip6tables.rules
Last Edit
03-06-2024 15:21