Note | Using btrfs on Debian
Notes debian using btrfs as main file system
想在 debian 上安裝 Btrfs,有很多種方式,這裡紀錄一下怎麼從頭開始安裝 debian,並且使用 Btrfs 作為主要的檔案系統。
Install Debian
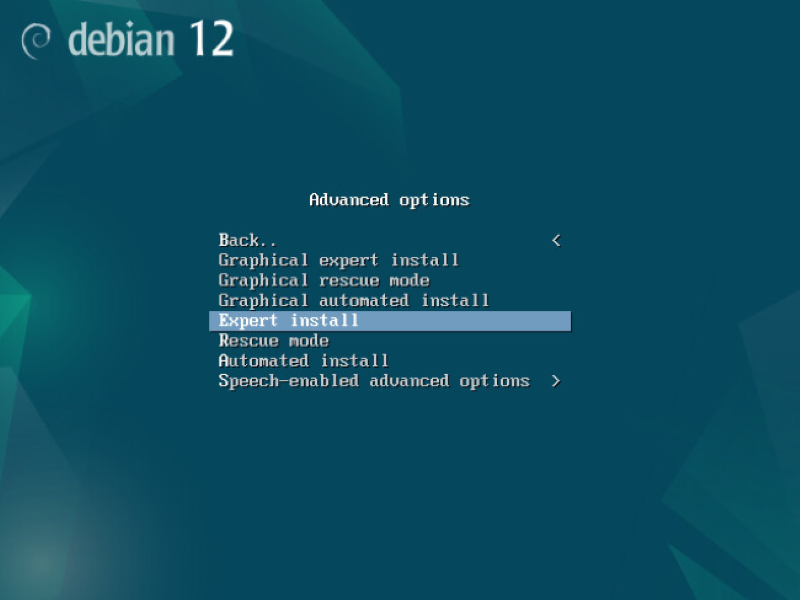
在安裝 Debian 的時候要進入 Advanced options,並且選擇 Expert install,這樣才能夠在安裝的時候選擇 Btrfs 作為檔案系統。 接著就跟標準的安裝方式一樣。
- 在這個過程中如果不確定的選項就直接按 Enter 就好,這樣就會使用預設的選項
Partition disks
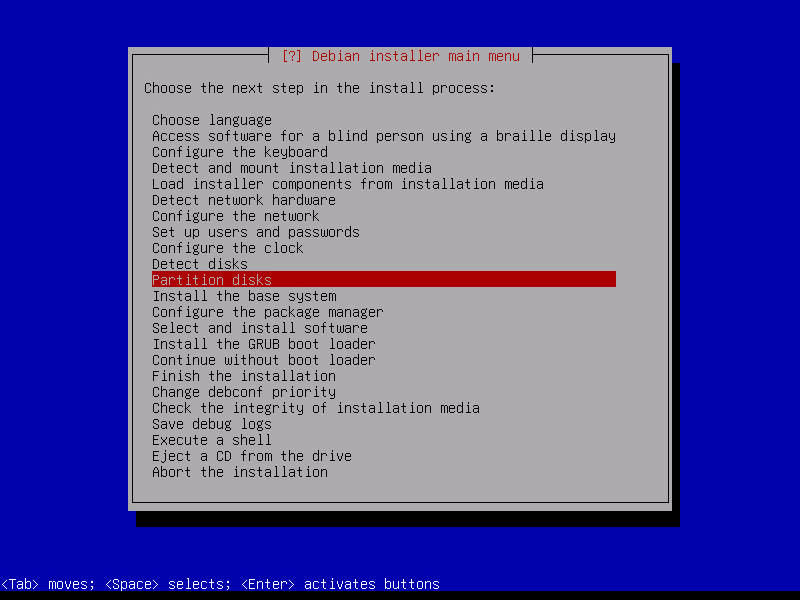
直到 Partition disks 的時候,才是這次要做的重點
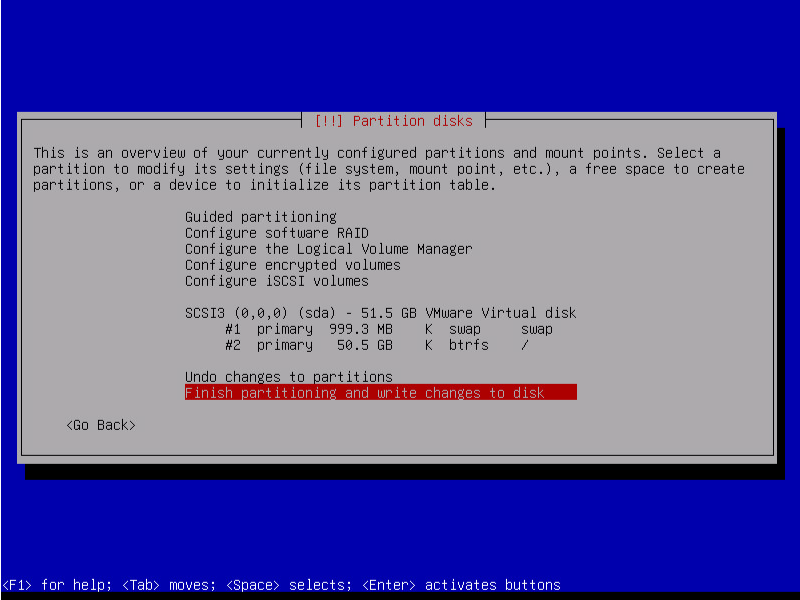
這邊要選擇 Manual,這樣才能夠自己選擇要安裝的檔案系統,並且自己分割硬碟,分割硬碟的時候只要分割出 SWAP 和 /, 其餘的都不做分割之後用 Btrfs 來管理 subvolume 就好。
- Manual
- gpt: 使用 UEFI 的啟動方式
- msdos: 傳統的 BIOS 啟動方式
分割好之後 alt + F2 進入 console,先 df -h 查看一下目前的狀況
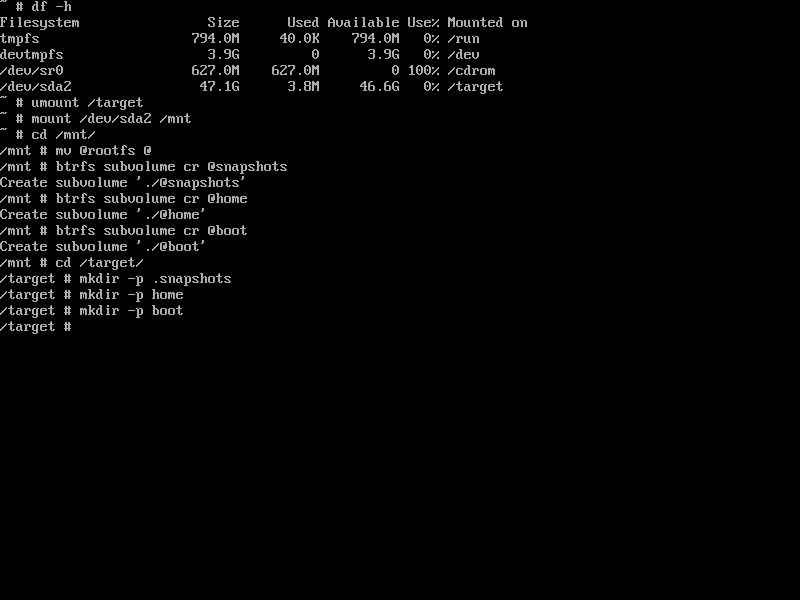
df -h

# Umount /target
umount /target

# Mount /mnt
mount /dev/{partition} /mnt

# Create subvolume and mount subvolume
cd /mnt
mv @rootfs @
btrfs subvolume create @boot
btrfs subvolume create @home
btrfs subvolume create @snapshots

# Mount rootfs
mount -o noatime,compress=zstd:1,space_cache=v2,ssd,discard=async,subvol=@ /dev/{partition} /target

cd /target
mkdir -p boot
mkdir -p home
mkdir -p .snapshots

mount -o noatime,compress=zstd:1,space_cache=v2,ssd,discard=async,subvol=@boot /dev/{partition} /target/boot
mount -o noatime,compress=zstd:1,space_cache=v2,ssd,discard=async,subvol=@home /dev/{partition} /target/home
mount -o noatime,compress=zstd:1,space_cache=v2,ssd,discard=async,subvol=@snapshots /dev/{partition} /target/.snapshots

# Umount /mnt
umount /mnt

nano /target/etc/fstab
nano 裡面 ctrl + k 剪下整行,ctrl + u 貼上
修改後的 fstab 應該會類似下面這樣,這樣就可以在重開機的時候自動掛載了
# /etc/fstab: static file system information.
#
# Use 'blkid' to print the universally unique identifier for a
# device; this may be used with UUID= as a more robust way to name devices
# that works even if disks are added and removed. See fstab(5).
#
# systemd generates mount units based on this file, see systemd.mount(5).
# Please run 'systemctl daemon-reload' after making changes here.
#
# <file system> <mount point>   <type>  <options>       <dump>  <pass>
# / was on /dev/sda2 during installation
UUID=82197af0-96dc-4967-90f6-05072569ebf6 /               btrfs   noatime,space_cache=v2,compress=zstd:1,ssd,discard=async,subvol=@            0       0
UUID=82197af0-96dc-4967-90f6-05072569ebf6 /home           btrfs   noatime,space_cache=v2,compress=zstd:1,ssd,discard=async,subvol=@home        0       0
UUID=82197af0-96dc-4967-90f6-05072569ebf6 /boot           btrfs   noatime,space_cache=v2,compress=zstd:1,ssd,discard=async,subvol=@boot        0       0
UUID=82197af0-96dc-4967-90f6-05072569ebf6 /.snapshots     btrfs   noatime,space_cache=v2,compress=zstd:1,ssd,discard=async,subvol=@snapshots   0       0
# swap was on /dev/sda1 during installation
UUID=bf901835-ce39-47cd-a225-d3f9c4b25685 none            swap    sw              0       0
/dev/sr0        /media/cdrom0   udf,iso9660 user,noauto     0       0
延伸閱讀: ArchWiki btrfs MOUNT OPTIONS, BTRFS documentation
上面的連結說明了 Mount Options 的意義,另外是官方的說明文件
上面操作結束後就 ctrl + alt + F1 回到安裝畫面,把剩下的步驟都完成就可以了,全部完成重開機之後,使用 findmnt | grep btrfs 確認一下有沒有掛載成功。
Sub-Volume & Snapshot
Sub-Volume
- 要在已經存在的 Sub-Volume 下創造 Sub-Volume 的方式就使用
btrfs subvolume create {path}- 這邊可以把這個操作當成跟建立目錄一樣去建立 subvolume
Snapshot
- 而建立 snapshot 的方式就是使用
btrfs subvolume snapshot -r {path} {snapshot}path: 目標的 subvolume 路徑snapshot: snapshot 的存放路徑r: read-only,避免 snapshot 之後被修改
如果想要還原的話也可以反向使用 snapshot 來還原,也就把上面的 path 和 snapshot 對調並且把 r 拿掉就可以。
這邊只講了很基礎的 btrfs 建立步驟,實際上 btrfs 還有很多需要調校的地方,例如: docker container 或是 tmp 這樣會頻繁寫入的地方,是否還需要使用 cow,這些都需要自己去調校,這部分之後要再研究一下。
Last Edit
01-07-2024 14:59